
There is a profound silence that falls over a room when a truly great tray of smash burgers is served. I’ve seen it happen in busy gastropubs and at quiet family tables alike. These Perfect Smash Burgers are my version of that magic—bold, thick with flavor, and boasting those deeply savory, lacy edges. Whether you’re a purist who believes American cheese is the only way to go or you love a gourmet topping, this recipe is designed to be your ultimate fast-paced kitchen companion.
I remember one particularly freezing winter in Savannah when I was helping a friend launch a small zero-waste pop-up. We had a massive amount of beef trim and a heavy-duty cast iron griddle. We decided to perfect the “smash” technique, realizing that the more surface area we created, the more flavor we unlocked. By the end of the night, the aroma of caramelizing beef fat was so intoxicating that people were lining up just to watch the sizzle. That experience taught me the most important lesson about burgers: Heat is an ingredient. You can’t rush the crust into a perfect patty.
Why You’ll Love This Recipe
- The “Flavor Depth” Guarantee: We rely on the Maillard reaction—a professional term for that beautiful browning that happens when beef meets high heat—to unlock layers of savory aromatics.
- Budget-Friendly Bulk: One pound of 80/20 ground beef goes a long way when smashed thin, feeding a family for a fraction of the cost of a “boutique” burger joint.
- The “Reset” Meal: This is the ultimate quick-fix dinner. From prep to plate, you are looking at 15 minutes of work for a high-reward result.
- Customizable Heat: You control the toppings. Add pickled jalapeños for a “Texas Handshake” (hot!) or keep it cool with extra mayo and lettuce.
- One-Pan Simplicity: If you use a large cast-iron skillet, everything—from toasting the buns to searing the meat—happens in one place. Minimal cleanup for a busy weeknight.
- Zero-Waste Potential: This is the perfect “fridge-clearing” recipe. That last bit of onion, a single slice of bacon, or the dregs of a pickle jar? They all belong on this burger.
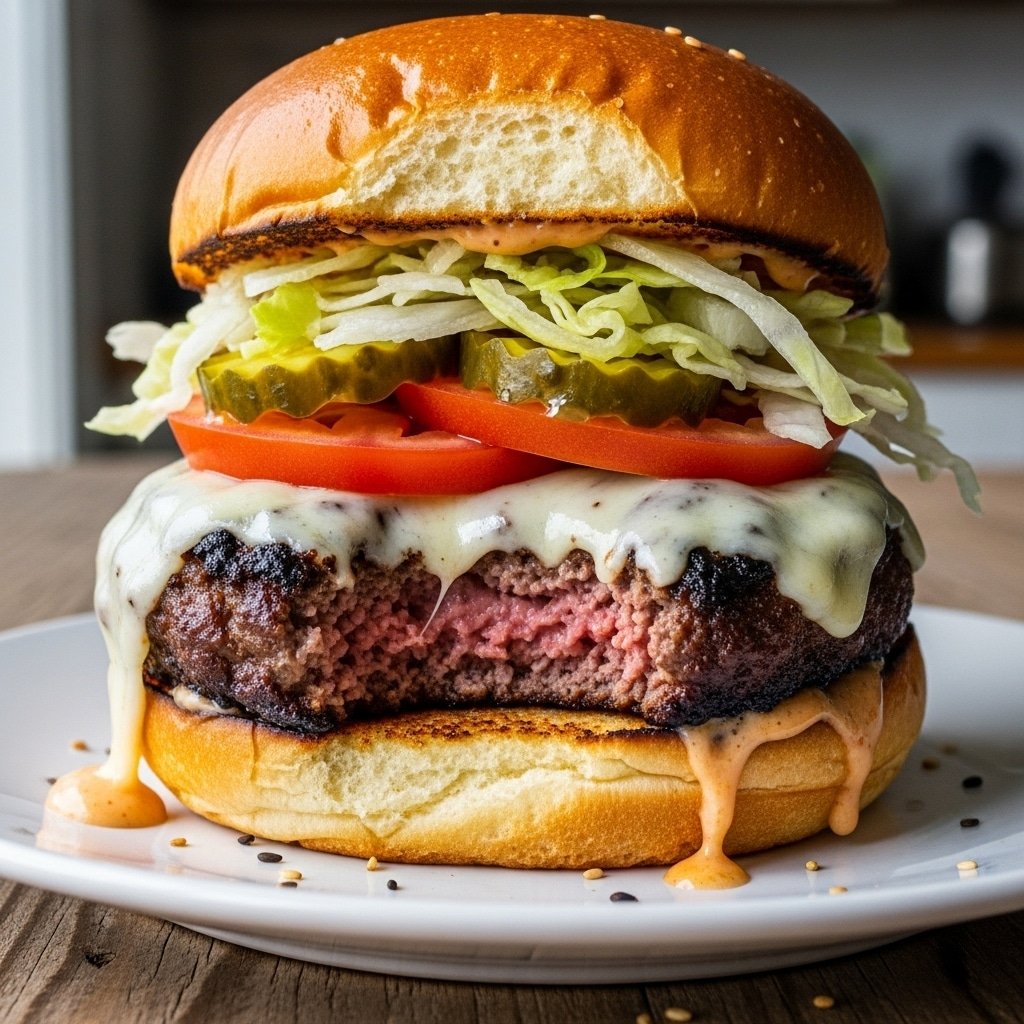
- The “Lacy” Edge: The high fat content renders out to essentially fry the edges of the meat, creating a shattering crispness that is pure burger gold.
- Better Than Takeout: By the time you’d wait for a delivery driver, you can have a fresh, steaming burger in your hand.
Health Benefits
- Protein Powerhouse: Packed with iron and B12 from the beef, essential for energy levels and muscle recovery.
- Metabolism Boost: If you add the optional spicy special sauce or jalapeños, capsaicin provides a natural thermogenic kick.
- Antioxidant Rich: Fresh toppings like red onion and tomatoes provide vitamin C and lycopene, helping to balance the richness of the meal.
- Immune Support: Garlic and onion powder in the special sauce offer sulfur compounds that are great for staying resilient during the winter months.
Ingredients at a Glance
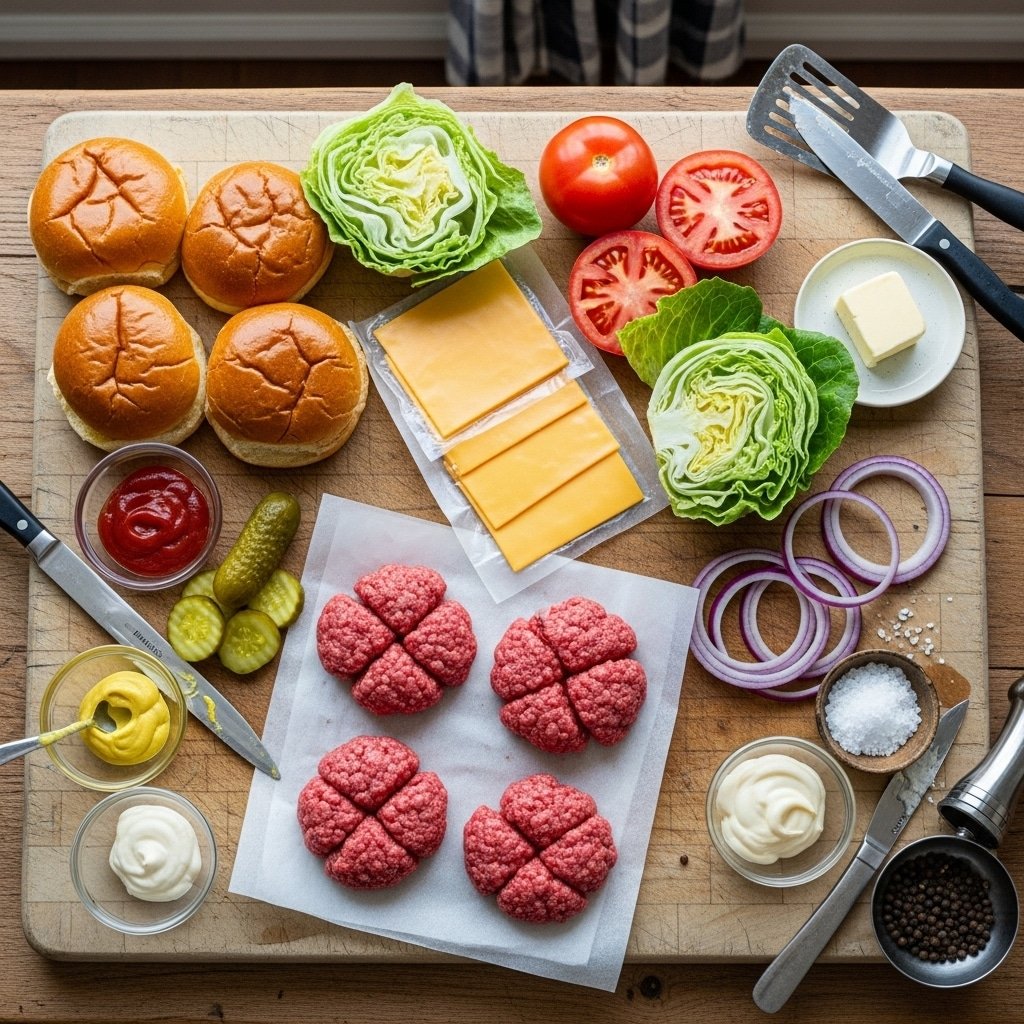
- 1.5 lbs 80/20 Ground Beef: This ratio is non-negotiable. You need that 20% fat to render out; it’s what actually fries the edges of the meat to create the “lacy” texture.
- The Buns: Potato buns or Brioche. You want something soft that will compress under your grip, soaking up the juices without falling apart.
- The Seasoning: Just kosher salt and fresh cracked black pepper. When you have high-quality beef and a good sear, you don’t want to hide it behind a dozen spices.
- American Cheese: It has the perfect melting point and sodium citrate content to give you that “liquid gold” drape over the meat.
- The “Special” Sauce: A mix of mayo, ketchup, relish, and vinegar. The acidity is vital to cut through the heavy fat of the burger.
- The Crunch: Shredded iceberg lettuce. It provides a cold, watery crunch that contrasts perfectly with the hot, salty beef.
Step-by-Step Overview
- The Cold Ball: Divide your beef into loose 3-4 ounce balls. Do not overwork the meat! You want the strands of beef to stay loose so the juices have places to hide. Keep them cold until they hit the pan.
- The Screaming Pan: Heat your cast iron until it is literally smoking. A drop of water should dance and disappear instantly. No oil is needed; the beef fat does the work.
- The Smash: Place the ball in the pan and immediately press down with a heavy metal spatula. Use a second tool (like a rolling pin or another spatula) to apply maximum pressure. Smash it until it’s about 1/4 inch thick.
- The Long Wait: Leave it alone. Don’t touch it for 2 minutes. You are waiting for that dark, mahogany crust to form.
- The Scrape: This is the professional secret. Use a sharp, thin metal spatula to scrape under the crust. You want every single bit of that brown lace to stay attached to the meat when you flip.
- The Melt: Flip, add the cheese immediately, and cover with a lid for 30 seconds to create a steam dome. This ensures the cheese is molten before the bottom overcooks.
Sofia’s Professional Secrets
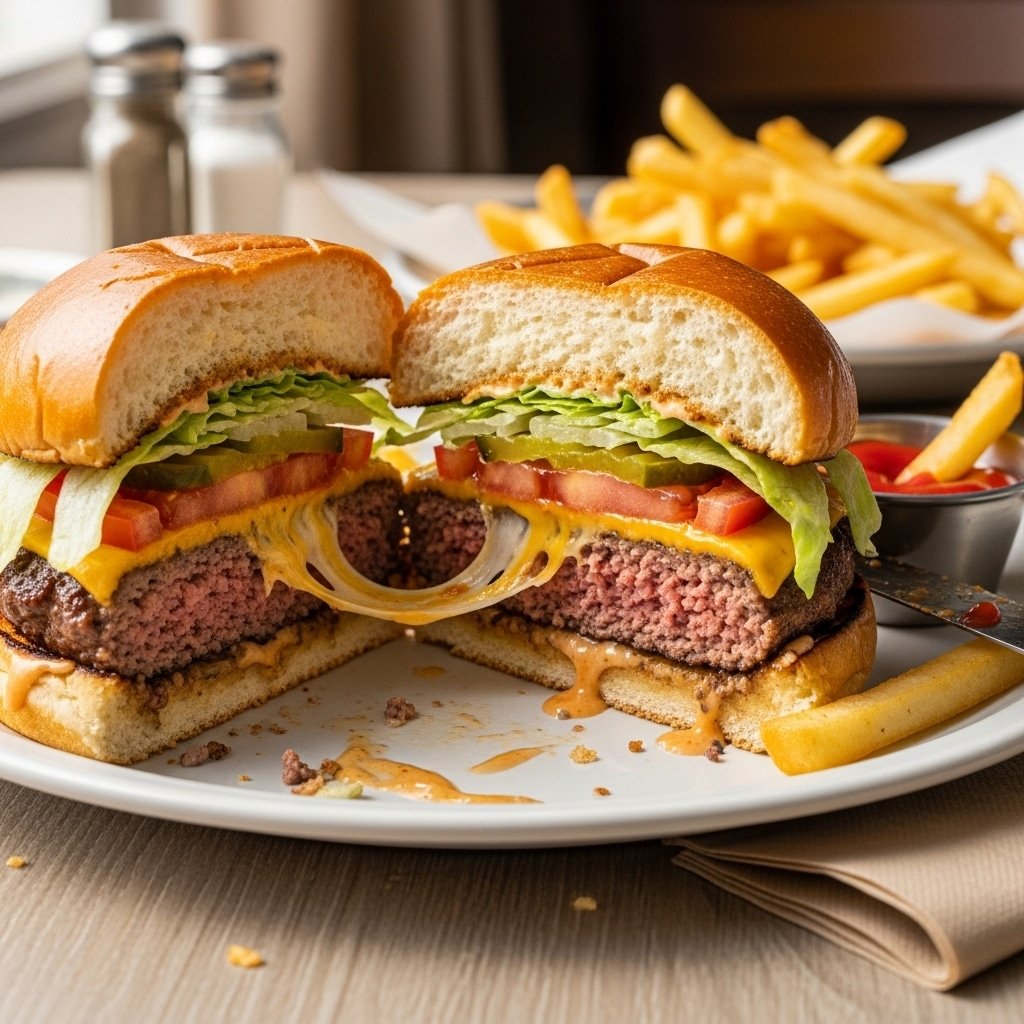
- The “Single Bite” Shot: When plating, lift the top bun slightly or hold a half-cut burger towards the camera. A hand holds a spoon (or in this case, the burger), lifting a single bite towards the camera, slow-motion, to clearly showcase its texture and detail. Focus on the contrast between the yellow cheese and the dark beef.
- The “Umami” Add-ins: If you want a deeper flavor, brush a tiny bit of yellow mustard on the raw side of the patty before flipping. It “fries” into the meat for a classic diner profile.
- Zero-Waste Hack: Don’t throw away the onion scraps! Finely dice them and smash them into the raw side of the beef before flipping to create an “Oklahoma-style” onion burger.
- The “Parchment” Trick: Place a small square of parchment paper between your spatula and the meat when you smash. It prevents the raw beef from sticking to the cold metal and tearing your patty.
- Acid Balance: If the burger feels too heavy, add an extra splash of pickle brine to your special sauce. That hit of vinegar “wakes up” the palate.
- The Cold Sear: I always keep my beef balls in the fridge until the very second they hit the pan. The temperature difference between the cold meat and the hot iron creates a better steam release and a crispier crust.
Experience Troubleshooting
- “My burger is steaming, not searing.” This usually happens if the pan isn’t hot enough or if you overcrowded it. Only do two patties at a time in a standard skillet. If the temperature drops, the meat will grey instead of brown.
- “The meat is sticking to my spatula.” See the parchment trick above! Also, make sure you are using a metal spatula, not plastic. Plastic can’t get under the crust effectively.
- “The patty is falling apart.” This means you didn’t smash it quickly enough. You have to smash within the first 10 seconds while the fat is still solid. Once the fat melts, the meat won’t “bond” to itself as well.
- “It’s too salty.” Remember that we only season the outside. If you are using American cheese, go a little lighter on the salt than you think, as the cheese itself is quite salty.
Ways to Switch It Up
- The “Broke” Version: Make “sliders” by using 2-ounce balls on small dinner rolls. It makes 1 pound of beef feel like a massive feast for a group.
- The High-Protein Twist: Use ground bison. It’s leaner but has a massive iron hit. You’ll need to add a teaspoon of butter to the pan first since bison lacks the fat of 80/20 beef.
- Mushroom Swiss Smash: Sauté mushrooms in the same pan while the burgers rest. The beef fat makes the mushrooms taste incredible.
- The “Breakfast” Burger: Top with a crispy fried egg and a maple-syrup drizzle. It’s the ultimate weekend brunch move.
- Zero-Waste Hero: If you have half a bag of kale or spinach that’s wilting, sauté it quickly in the burger drippings with some garlic. It’s the best way to get your greens in.
Keeping It Fresh
Smash burgers are best eaten immediately—the crispy edges are a fleeting beauty. However, if you have leftovers, store the patties separately from the buns. To reheat, avoid the microwave! Use a toaster oven or a hot skillet for 60 seconds per side to try and revive that crunch. Pro Tip: Leftover smash patties make the world’s best “burger salad” the next day—just crumble them over greens with some pickles and thousand island dressing.
Save This One
Pin this to your “15-Minute Meals” or “Grill Master” board. It’s a recipe that has been refined through years of professional line-cooking and late-night experiments. It’s the one I reach for whenever I want a meal that feels like a celebration but only takes minutes to execute.
Stuff People Ask Me
- Q: “Can I use ground turkey?”
- A: You can, but you’ll need to add a fat source (like oil or butter) to the pan, as turkey won’t “self-fry” the way beef does.
- Q: “What if I don’t have a cast iron skillet?”
- A: Use your heaviest stainless steel pan. Avoid non-stick; it can’t handle the high heat required for a true smash and won’t develop the same crust.
- Q: “Is it really a burger if it’s that thin?”
- A: It’s better than a burger—it’s a concentrated flavor disc. Two thin patties are always better than one thick one because you get double the crust.
- Q: “How do I stop the smoke alarm from going off?”
- A: Open a window and turn on your vent hood! High-heat searing is a smoky business, but that’s the smell of success.
One More Thing
Cooking is a personal journey. Some like their burgers “animal style” with extra sauce; others want just meat and bread. Adjust your sear time to find your perfect balance of “lacy” vs “juicy.” Now, get that skillet screaming hot and get to work!
Perfect Smash Burgers
Ingredients
Equipment
Method
- Divide the cold beef into 4 equal portions (about 6oz each) or 8 portions for doubles. Roll into loose balls. Do not overwork the meat or season the inside.
- Heat a cast iron skillet over high heat for 5 minutes until it is smoking slightly. Do not add oil; the beef will provide its own lubricant.
- Place two beef balls in the skillet. Place a square of parchment paper over the meat and smash down hard with a heavy spatula until the patty is about 1/4 inch thick. Remove parchment.
- Season the top generously with salt and pepper. Let it sear undisturbed for 2 minutes until the edges are dark brown and crispy.
- Use a sharp metal spatula to scrape under the crust and flip. Immediately top with a slice of cheese. Cook for 60 more seconds.
- Toast your buns in the burger drippings. Build with sauce, lettuce, and the hot patty. Serve immediately.